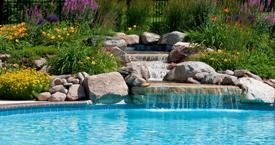
Pool Resurfacing
1. Personal Appointment with "Pete the Pool Guy"
“Pete the Pool Guy” the owner of Comfort Pools will personally set up an appointment, come to your home, and give you a detailed estimate. He will answer all of your questions and give you a time frame for completion.
2. Drain Your Existing Pool
Once agreed as to price and the time to start, draining your swimming pool is the first step in the creation of your new backyard paradise. Since it is possible for swimming pools to “pop out” of the ground, each and every pool that is drained is personally overseen by Pete. Draining a pool means to use either a sump pump or a gas pump to drain the water out of your pool. This water must be dumped in an area within 100 feet of the pool. We will select a convenient area unless you request otherwise.
3. Pressure Release
This is the process used to remove water pressure from under the pool. If this is not done sever damage could be done to the pool. The process involves removing the plug inside the main drain pot. Water will then be removed from under the pool thus relieving the pressure.
4. Undercut Tile, Plumbing, Fitting, Lights, etc.
Our well-trained crew will make one cut directly under the tile. Similar cuts will be made around lights and fittings. The cuts will be about ½” deep. This process is on one of the MOST IMPORTANT procedures, ensuring a proper installation.
5. Remove Loose and Rotted Surface
Our well-trained crew will make one cut directly under the tile. Similar cuts will be made around lights and fittings. The cuts will be about ½” deep. This process is on one of the MOST IMPORTANT procedures, ensuring a proper installation.
6. Replace Fitting
We will replace the return fitting in your pool. In very rare instances, occurring with older pools, the return fittings needed for a proper fit are no longer made. We will try to reuse the old fitting if possible.
7. Acid Wash and Neutralize
The process of acid washing will remove any contaminants that will interfere with the bonding of the Bond Coat. Acid also etches the surface creating a rough surface that will facilitate a stronger bond.
8. If applicable, apply Bond Coat
The “Bond Kote” material is an acrylic modified cement and sand mixture. The two-part material, one part resin, and one part bonding cement is mixed together and then rolled onto the pool wall and floor. The Bond Coat will cover the entire pool and will ensure the bond of the new finish. For more info on Bond Coat go to: http://sgm.cc/html/swim/surface2.html#BondKote .
9. Apply Finish OF YOUR CHOICE
It is put on with two coats: The pool finish is installed to an average thickness of 3/8″ to achieve this thickness two coats are used. The first coat is called the “scratch.” This first coat is the base for the second coat to stick to. The second coat is the fish coat and is needed to achieve the proper thickness. The coats are put on quickly as there should be minimum drying time between coats.
10. Treat Water During Fill Up
Water is treated and filtered during fill up with a commercial-grade sequestering agent to remove all impurities from the water, preventing stains and metal deposits to form. Water is filtered with a small commercial filter.
Once the pool is full we offer the option of sending a trained water technician to balance the chemicals in your pool. We will add chemicals to balance water, stabilizer, chlorine, and acid. The pool pump will be restarted or we can leave you instructions.

